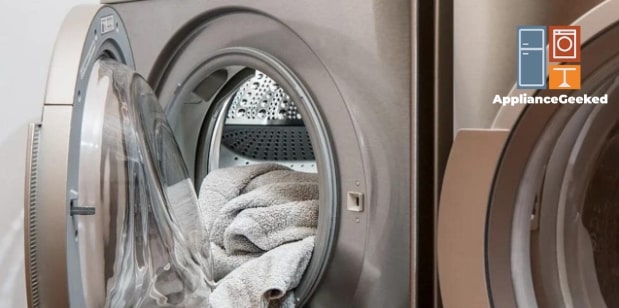
Having a dryer at home is very convenient. Typically, it only takes me anywhere from 30 to 45 minutes to dry a regular load of clothes, but if I don’t clean the unit regularly, it might take longer than that.
This decline in efficiency could be accompanied by a check vent error, which can pose safety hazards if left unchecked. Although it sounds quite intimidating, it’s really easy to resolve.
We’ll show you how to fix a dryer check vent error like a pro. With a few tools and our easy-to-follow instructions, you can get your dryer back up and running in no time.
What is a dryer check vent error?
A check vent error appears when a dryer detects restricted airflow in the system, which reduces its efficiency. An obstructed lint screen, a bent vent hose, or a clogged exhaust vent are likely causes.
Luckily, a dryer check vent error is something you can resolve without professional services. Here are a few ways to troubleshoot the problem.
- Reset the dryer.
Power interruptions may cause your system to malfunction temporarily, prompting all sorts of errors. Just disconnect your dryer from its power source for a few minutes to clear any possible glitches.
- Confirm that the lint screen is installed properly.
A loose or missing lint screen may cause the dryer to overheat, so make sure to install it properly after cleaning. Just pull the screen out of the dryer and reinstall it to resolve the error.
- Inspect the lint screen for damage, and replace it if needed.
Check if the lint screen is torn. If there is damage to the lint screen, it can no longer effectively trap lint from your clothes and may cause a blockage in your exhaust vent system.
Get a replacement for your lint screen. Don’t run a load until you’ve replaced the broken part.
If the error still recurs, keep reading our guide. We’ll delve into other potential causes and help you determine what you might be dealing with.
Causes and Solutions
Let’s take a closer look at a few potential causes of a check vent error on a dryer. We provide step-by-step instructions to help you resolve each one like a pro.
| Causes | Solutions |
| Clogged Lint Screen | Disconnect your dryer from its power source. Locate the lint screen in your dryer. Use the user manual for reference. Remove the lint screen. Use your fingers to roll the lint off the screen. Soak the lint screen in hot water for a few minutes. Mix liquid detergent and hot water in a small container. Dip a nylon brush into the solution and use it to scrub off the remaining lint on the screen. After brushing, rinse each side with hot water. Inspect the screen for any lint or detergent build-up. Scrub and rinse the screen again if needed. Use a vacuum to remove dirt build-up in the cavity. Next, use a long-handled wire vent brush to reach further into the cavity and remove more lint. Repeat this step until the brush comes out clean. Wipe the area clean. Then, wipe the lint screen dry before reinstalling it. Reconnect your dryer to power to confirm that the check vent error has cleared. |
| Kinked or Crushed Dryer Vent Hose | Disconnect your dryer from its power source. Pull the dryer about a foot away from the wall. Remove the tape or clamps on the vent hose that connects the dryer to the vent system. Set your vent hose on a flat surface. Get a PVC pipe and slip it about 2 inches into the hose. Gently roll the vent hose with the PVC pipe inside to smoothen out the edges. Cut three slots on the tubing to widen the opening. Use pliers to make hook-like protrusions on the dryer vent. Install the hose over the vent. Then, press down around the opening area to keep it in place. Tighten the clamp to secure the hose. Reconnect the dryer to its power source to verify that the check vent error has cleared. |
| Clogged Dryer Vent | Disconnect the dryer from its power source. Pull the dryer about a foot away from the wall. Remove the tape or clamps on the vent hose connecting the dryer to the vent system. Remove any visible lint on the hose. Then, vacuum the remaining dirt. Slide the vacuum’s hose into the vent at the back of the dryer. Get a long-handled brush and reach into the vent to remove lint. Pull out the brush and vacuum the bristles. Repeat this step until the brush comes out clean. Reconnect the vent hose to the dryer and vent system. Turn on the dryer and confirm that the check vent error has cleared. |
| Blocked Outdoor Exhaust Hood | Disconnect your dryer from its power source. Remove any visible lint on the outside exhaust hood using your hands or a long-handled brush. Remove the louvers of the exhaust hood. If you have an angled or a boxed type hood, skip this step. Mix hot water and dishwashing liquid in a small container. Dip a clean cloth in this cleaning solution. Wipe the exhaust hood clean using the cloth. Assemble your long-handled wire vent brush by attaching the adapter to the drill and tightening it. Add the flexible rods, one at a time, until you reach your preferred length. Tape the rods at the seams. Carefully slide the brush into the ductwork. Press the drill to rotate. Then, pull out the brush and remove all the lint. Slip the brush into the ductwork again and repeat until it comes out clean. Reinstall the louvers. Turn on your dryer and confirm if the check vent error has cleared. |
Clogged Lint Screen
The lint screen is a mesh-like filter that traps any loose fibers and lint during the drying process. It collects all the gunk that can clog the vent system and restrict airflow.
You must clean the filter after every load to prevent potential problems. If there’s too much lint build-up on the screen, your clothes will take a longer time to dry and you’ll likely see the check vent error appear.
It’s important to clean the screen as the lint build-up is flammable, which can potentially cause a house fire due to the heat from the dryer.
What you’ll need:
- Hot water
- Liquid detergent
- Nylon brush (or an old toothbrush)
- Small container
- Long-handled wire vent brush
- Clean towels
- Vacuum
Solution: To clean a dryer’s clogged lint screen, follow these steps:
- Step 1: Disconnect your dryer from its power source.
- Step 2: Locate the lint screen in your dryer. Use the user manual for reference.
- Step 3: Remove the lint screen.
- Step 4: Use your fingers to roll the dirt off the screen.
- Step 5: Soak the lint screen in hot water for a few minutes.
- Step 6: Mix liquid detergent and hot water in a small container.
- Step 7: Dip a nylon brush (or old toothbrush) into the cleaning solution. Then, scrub the remaining lint off the screen.
- Step 8: Rinse each side with hot water.
- Step 9: Inspect the screen for any lint or detergent build-up. Scrub and rinse the screen again if needed.
- Step 10: Use a vacuum to remove any dirt build-up inside the cavity.
- Step 11: Use a long-handled wire vent brush to reach inside the cavity and remove any remaining dirt. Pull the brush out and remove the lint.
Repeat this step until the brush comes out clean.
- Step 12: Wipe the area clean. Then, wipe the lint screen dry with a clean towel before reinstalling it into the dryer.
- Step 13: Reconnect your dryer to power to confirm that the check vent error has cleared.
Quick Note:
Never run a dryer if your lint screen is damaged or missing. It can overheat, which can ruin your clothes and your machine.
Kinked or Crushed Dryer Vent Hose
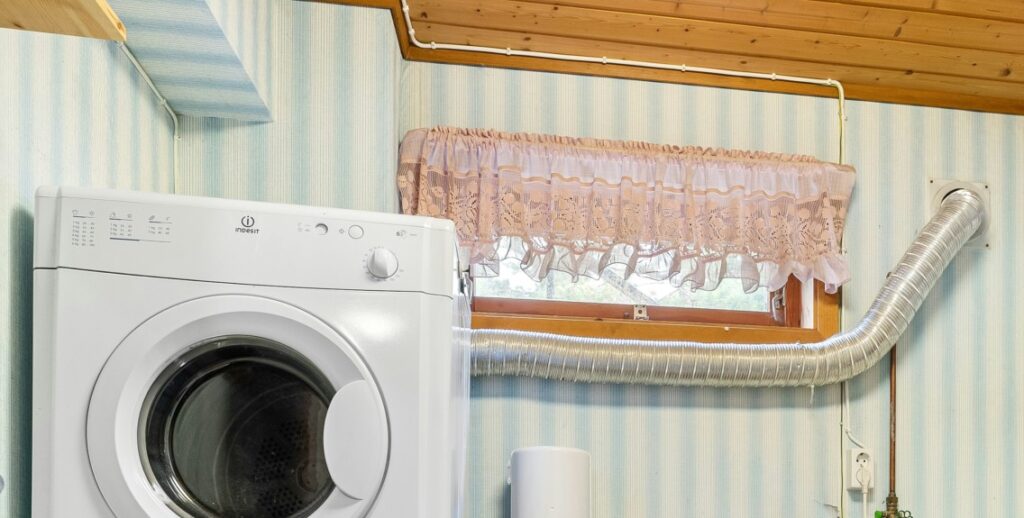
One of the most common causes of a check vent error is a kinked or crushed dryer vent hose. Connecting the dryer to the outside vent, the hose helps expel hot air, lint, and moisture during the drying cycle.
Rigid metal ducts are more durable than plastic and foil tubing. They won’t easily get crushed or kinked when your dryer is pushed back onto the wall, which can cause venting issues and prompt a check vent error.
More importantly, metal vent kits are the safest option as plastic and foil tubing can easily catch fire from the hot lint that accumulates in the dryer.
What you’ll need:
- Scissors
- Pliers
- PVC pipe
- Rigid/flexible venting material
Solution: To straighten out kinks in your dryer vent hose, follow these steps:
- Step 1: Disconnect your dryer from its power source.
- Step 2: Pull the dryer about a foot away from the wall.
- Step 3: Remove the tape or clamps on the vent hose that connects the dryer to the vent system.
- Step 4: Set your vent hose on a flat surface. Get a PVC pipe and slip it about 2 inches into the hose.
- Step 5: Gently roll the vent hose with the PVC pipe inside to smoothen out the edges.
- Step 6: Cut three slots on the tubing to widen the opening.
- Step 7: Use pliers to make hook-like protrusions on the dryer vent.
- Step 8: Install the hose over the vent. Then, press down around the opening area to keep it in place.
- Step 9: Tighten the clamp to secure the hose.
- Step 10: Reconnect the dryer to its power source to verify that the check vent error has cleared.
Quick Note:
Never use plastic or foil vent kits for your dryer because they can be fire hazards. Instead, invest in rigid metal ducts made of galvanized steel or semi-rigid alternatives.
Clogged Dryer Vent
After cleaning the lint filter and the dryer vent hose, you can look for possible obstructions in your dryer’s vent area. This is where you connect the hose to the dryer.
Lint can build up here as well, restricting airflow and forcing your dryer to use more energy to push the air out of the system. You should inspect and clean this area once or twice every 6 months, depending on your usage.
What you’ll need:
- Vacuum
- Long-handled brush
Solution: To clean the dryer vent, follow these steps:
- Step 1: Disconnect the dryer from its power source.
- Step 2: Pull the dryer about a foot away from the wall.
- Step 3: Remove the tape or clamps on the vent hose connecting the dryer to the vent system.
- Step 4: Remove any visible lint on the hose. Then, vacuum the remaining dirt.
- Step 5: Slide the vacuum’s hose into the vent at the back of the dryer.
- Step 6: Get a long-handled brush and reach into the vent to remove lint. Pull out the brush and vacuum the bristles.
Repeat this step until the brush comes out clean.
- Step 7: Reconnect the vent hose to the dryer and vent system.
- Step 8: Turn on the dryer and confirm that the check vent error has cleared.
Blocked Outdoor Exhaust Hood
If you’re done removing obstructions in the dryer and straightening any kinks on the hose, and you’re still seeing the check vent error, it’s time to clean the outdoor dryer vent.
Located in your home’s exterior wall, this exhaust hood is where hot air, lint, and moisture are expelled from the dryer. Like the dryer vent, you must inspect and clean this at least once or twice every six months to remove dirt build-up.
Depending on the type of exhaust hood you’ve installed, birds and other critters can crawl inside and build a nest. This can create further venting issues, reduced efficiency, increased energy usage, and potential fire hazards.
What you’ll need:
- Hot water
- Clean cloth
- Electrical tape
- Dishwashing liquid
- Dryer vent cleaning rods
- Long-handled wire brush
Solution: First, inspect the vent system’s airflow for possible blockages. If it’s obstructed, proceed to clean it.
- Step 1: Turn on the dryer. Set it on Air Dry for 5 to 10 minutes.
- Step 2: Press Start.
- Step 3: Place your hand on the exhaust hood to check the airflow.
If the air feels similar to a hair dryer on high speed, your vent system has no obstructions. However, if it isn’t as strong, dirt is most likely building up inside and restricting airflow.
To remove the obstructions, follow these steps:
- Step 1: Disconnect your dryer from its power source.
- Step 2: Remove any visible lint on the outside exhaust hood using your hands or a long-handled brush.
- Step 3: Remove the louvers of the exhaust hood. If you have an angled or a boxed type hood, skip this step.
- Step 4: Mix hot water and dishwashing liquid in a small container. Dip a clean cloth in this cleaning solution.
- Step 5: Wipe the exhaust hood clean using the cloth.
- Step 6: Assemble your long-handled wire vent brush by attaching the adapter to the drill and tightening it. Add the flexible rods, one at a time, until you reach your preferred length.
- Step 7: Tape the rods at the seams.
- Step 8: Carefully slide the brush into the ductwork.
- Step 9: Press the drill to rotate. Then, pull out the brush and remove all the lint.
- Step 10: Slip the brush into the ductwork again and repeat until it comes out clean.
- Step 11: Reinstall the louvers.
- Step 12: Turn on your dryer and confirm if the check vent error has cleared.
FAQs
Can I clean my dryer vent myself?
Yes, you can clean the dryer vent yourself. If your dryer is located on an exterior wall with a few feet of dryer vent between the wall and the exhaust outside, you can get the job done with very minimal effort.
If your dryer vent is rather long, it’s best to purchase a cleaning kit made for this purpose. There are various kits out there so the methods may vary, one of which is shown in our guide above.
How often do you need to clean the dryer exhaust vent?
You should inspect and clean the dryer exhaust vent at least once per year, depending on your usage and household size. If you have a large family or you simply use the dryer regularly, you must clean it more often.
Where is the lint screen on a dryer?
The location of a lint screen will vary per make and model. However, you’ll typically see it right in front of the drum or the control panel of a front-load dryer.
On a top-load dryer, the lint screen is often located on the inside of the door or in front of the control panel. You can check your user manual for reference.